Table of Contents Previous Screen Next Chapter
This section describes how users can apply without logging in.
The following information is provided in accordance with the procedures.
・MEMO: Supplementary information when accessing the URL in the notification e-mail.
・MEMO: Settings for attached files
・MEMO: About the calendar functions
1.
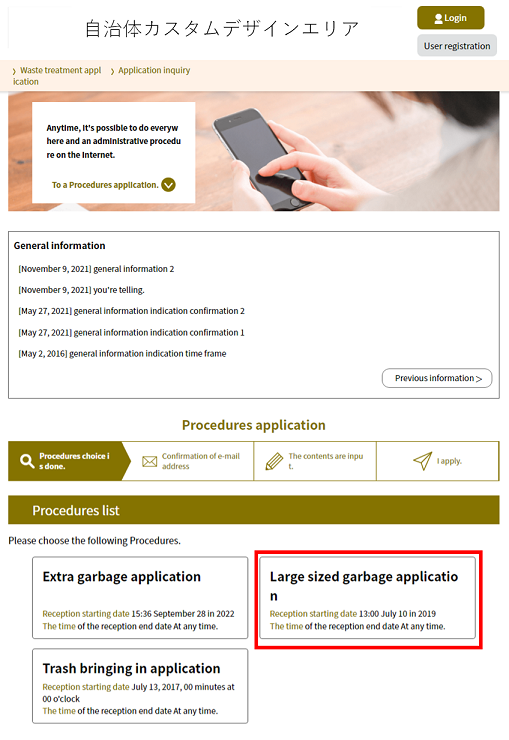
Click [Name of Procedure] from the «List of Procedures Screen».
The «User Login Screen» will be displayed to confirm your login to this service.
 |
|
2.
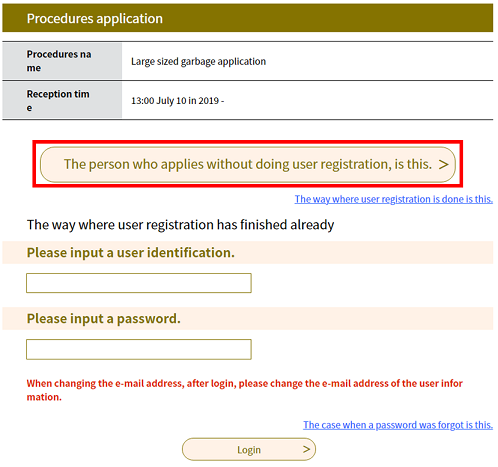
Click To Apply without Registering as a User .
The «Procedures Explanation Screen» will be displayed.
 |
|
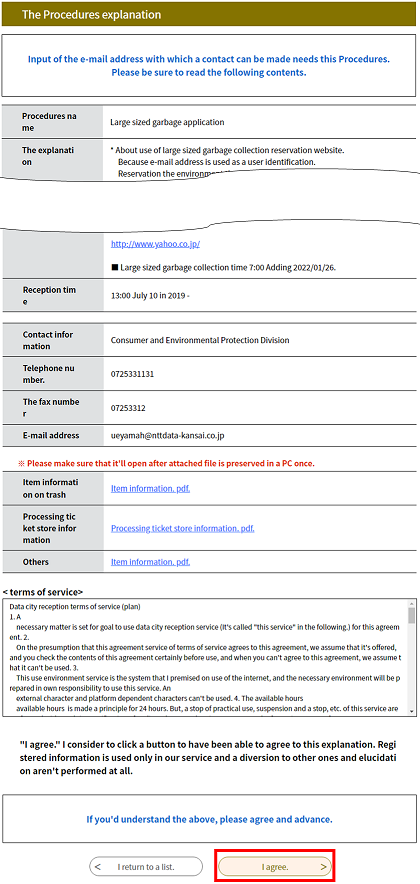
3. Please confirm the procedure details and read the displayed terms.
Note: A file for download may be attached to the screen.
Please download the attachment to your PC, since it will be a notification of details about an application or a document that needs to be submitted.
(For steps, refer to "MEMO: About file downloads".)
 |
|
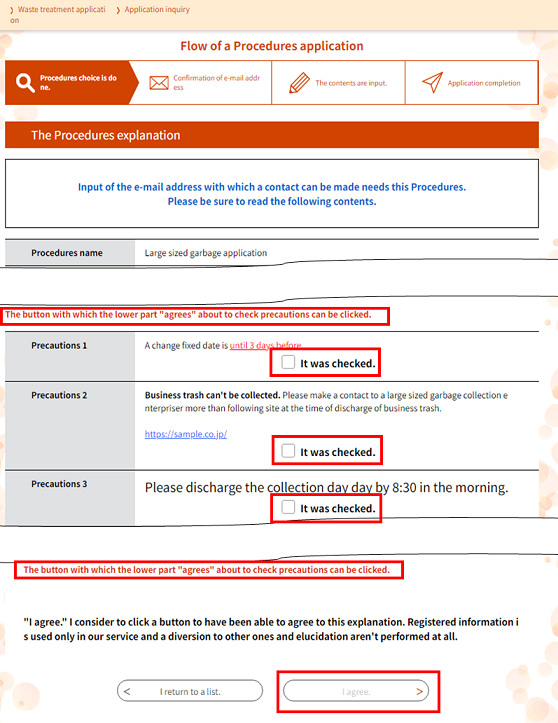
<Checking Notes>
If “Notes” appears on the «Procedures Explanation Screen», you must check the box to the left of "I have confirmed.”
You cannot proceed to the next screen without first checking the box.
About file downloads
Note: Differs according to browser.
If a file for download is attached to the «Procedures Explanation Screen» or «Application Details Screen»,
download the file as follows.
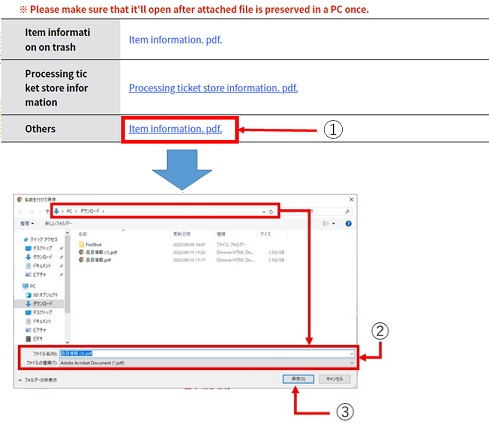
1. Click on the attached file.
2. Choose the location where you wish to save the file and select [File Name (N)] and [File Type (T)].
3. Click Save (S) .
4. The download will complete. Click Close and continue with procedures from the screen for this service.
(For details, refer to "MEMO: Settings for attached files".)
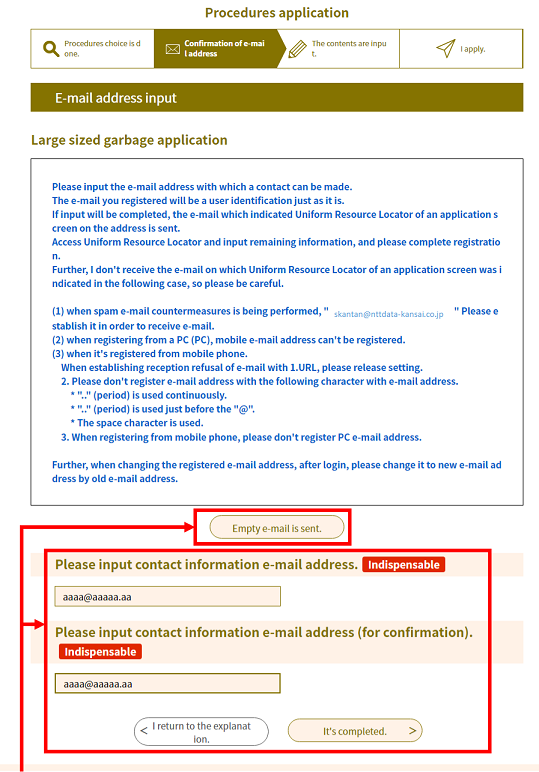
4.
If you click Agree , the screen to enter your e-mail address will be displayed.
To register by sending a blank e-mail, please click Send a Blank E-mail .
For a blank e-mail, proceed to Step 5.
To enter a contact e-mail address, enter your [E-mail Address] and click Complete .
Please proceed to Step 6.
Note: If this function is not shown, you cannot use it.
Note: If you are unable to click [Agree], confirm and scroll through the Terms of Use until the end. Once you have reached the end, [Agree] will become clickable.
| E-mail address |
Note: Please use an e-mail address that allows you to receive messages.
Note: If the e-mail address is one that you have already completed a [User Registration] for, please log in and apply. |
|
E-mail address (confirmation) |
Please re-enter the above e-mail address for confirmation. |
|
|
| Use either function to receive the e-mail. |
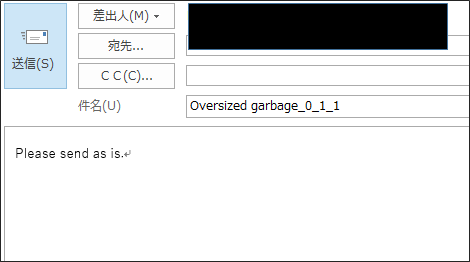
5. The system will display a new e-mail. Click the Send button. An e-mail containing a URL will be sent to the e-mail address entered earlier, so please proceed to Step 7.
Note: If this function is not shown, you cannot use it.
 |
|
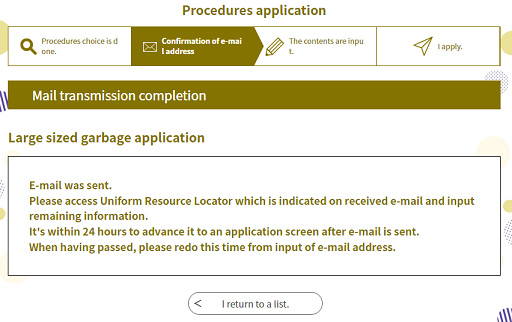
6.
The «E-mail Delivered Screen» will be displayed and an e-mail with the required URL will be sent to the indicated e-mail address.
Access the application screen from that URL and continue with the registration process.
 |
|
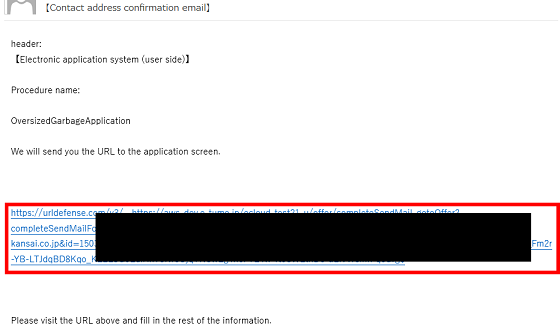
7.
Click the URL in the "contact address confirmation e-mail."
The «Application Screen» will be displayed.
 |
|
MEMO:
<Supplementary information when accessing the URL in the notification e-mail>
When you click the URL in the received notification e-mail, a new access screen will open and you can enter the rest of the application information on that screen.
You can close the original screen you were using if you no longer require it.
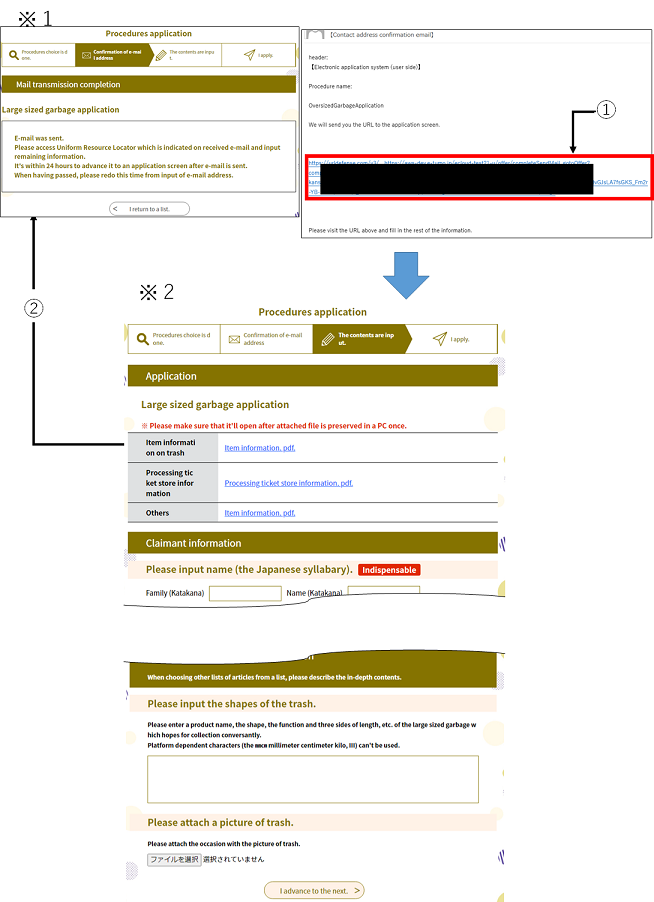
*2: The new access screen
1. If you access the URL in the notification e-mail while keeping the original screen open, a new access screen will open.
2. The original screen will remain open even after accessing the new screen.
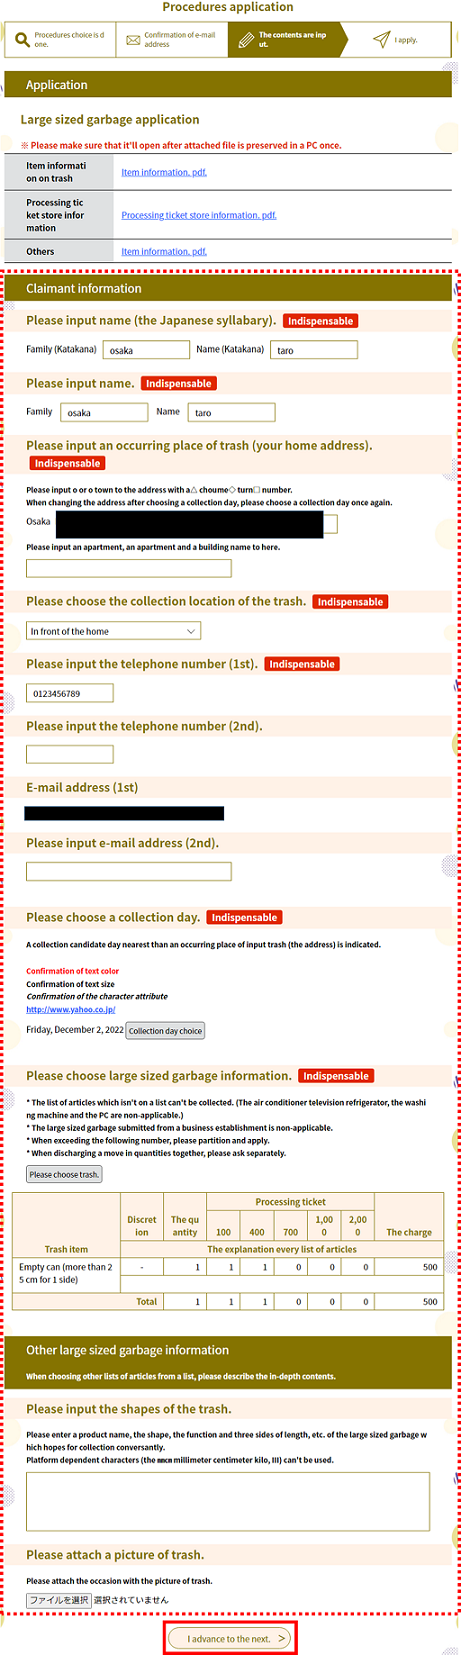
8.
Enter the needed information and click Next .
The collection (drop-off) location information will be displayed.
Note: Some procedures require you to set up attachment files such as images, etc. in «Application Screen». Please ensure that the information is complete and accurate before setting up the file attachment.
(For steps, refer to MEMO: Settings for attached files.)
Note: When the message “There is no past collection data with the same address, name (kana), and telephone number” is displayed, please apply by telephone.
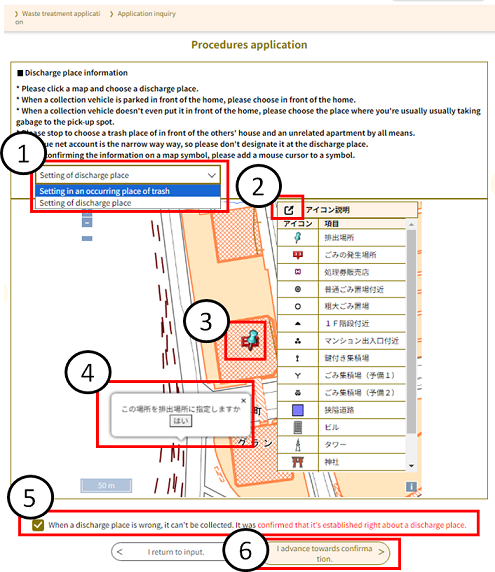
● If a map is shown after going to the next screen, you must set your garbage and collection point locations.
Please see the steps as detailed below.
|
① |
● Click on the map with “Set garbage location” selected to change your garbage and collection point locations.
|
|
|
② |
Click to close the descriptions of the icons shown on the map. |
|
| ③ |
|
This pin indicates the collection point. |
|
|
This pin indicates the garbage location. |
|
|
④ |
Click on the map and a pop-up will appear to confirm that you want to finalize the changes.
|
|
|
⑤ |
You may need to check that there are no errors in where the “collection point” and “garbage location” pins are located.
|
|
|
⑥ |
Once you have completed the settings, click "Proceed to confirmation”. You will be taken to the «Application Content Confirmation» screen. |
|


MEMO: Settings for attached files
After entering the required information in the file downloaded from the «Procedures Explanation Screen» or the «Application Details Screen», configure the attached files on the «Application Screen».
Carry out the following operations to set the attached files.
1. Click Reference... and the «File Selection Screen» will be displayed.
2. Select the file for attachment from Reference and click Open (O) .
You will be returned to the «Application Screen».

Note: The following types of file extensions can be sent.
<gif, jpeg, jpg, png, tif, tiff>
Note: An error message will be displayed if the file type is wrong, the size is too large, or the file is possibly infected with a virus.
Click Delete and choose the correct file.

<About the calendar function>
This system allows dates to be entered using the calendar function.
● Using the calendar function
1. Click Select Collection Date to open the calendar screen.
2. Upcoming dates available for collection are set to appear by default. When necessary, click “<Last Month” or “Next Month>” to move between calendar months.
The current month and next month can be displayed.
3. Clicking on an applicable date (Gregorian calendar) will enter the date in the Date field.
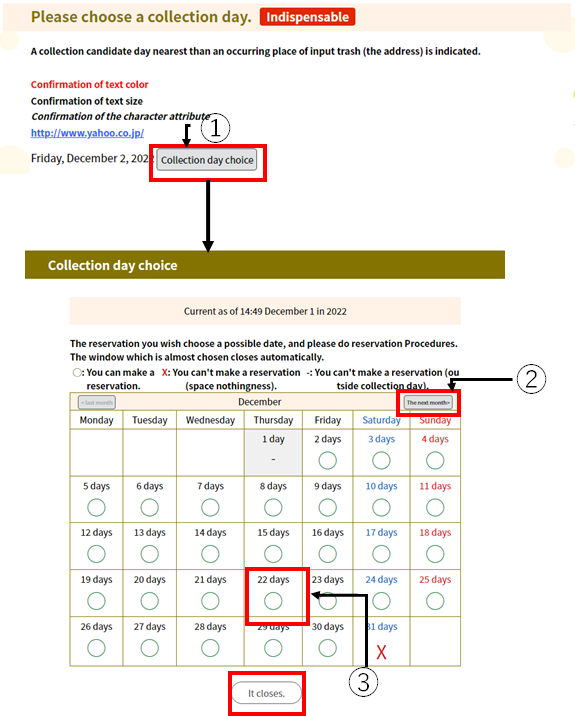
Note: To cancel the calendar entry, click Close on the bottom right.
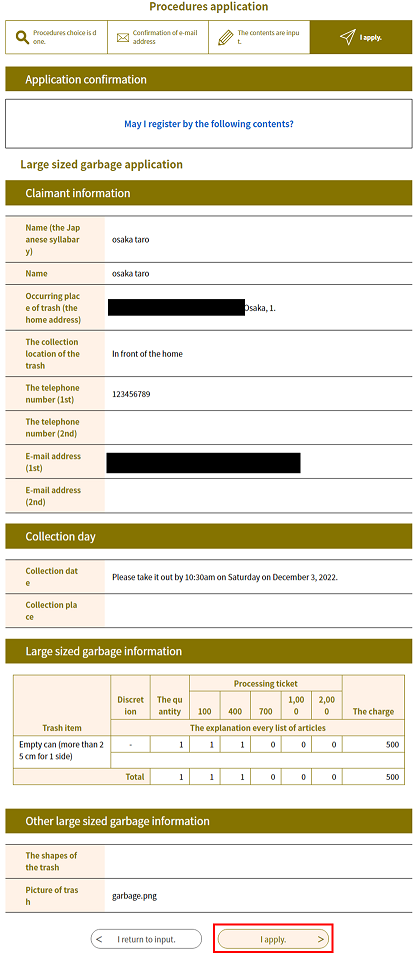
9.
Confirm the content and click Apply .
The «Application Completion Screen» will be displayed.
 |
|
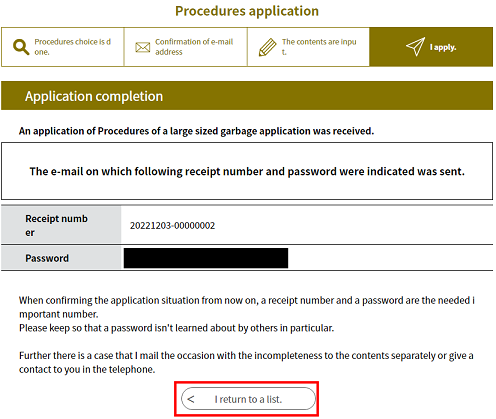
10. An [Application Number] and [Password] will be issued before the application procedure will complete.
Note: The [Application Number] and [Password] are required for authentication when performing an [Application Content Inquiry].
(For details, refer to 2.1.1 Application Inquiry Authentication.)
Note: This information is important, so it is recommended that you keep a copy of it, such as a screen shot.
 |
|
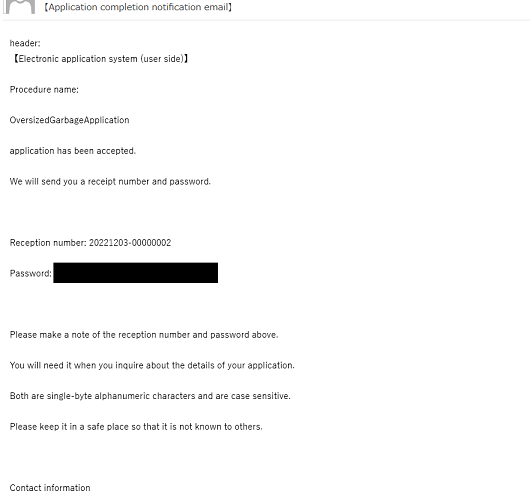
11.
For completing a procedure that requires entering an e-mail address, the user will receive an e-mail with the [Application Number] and [Password].
Note: Confirm the content and keep the message in a safe place.
 |
|